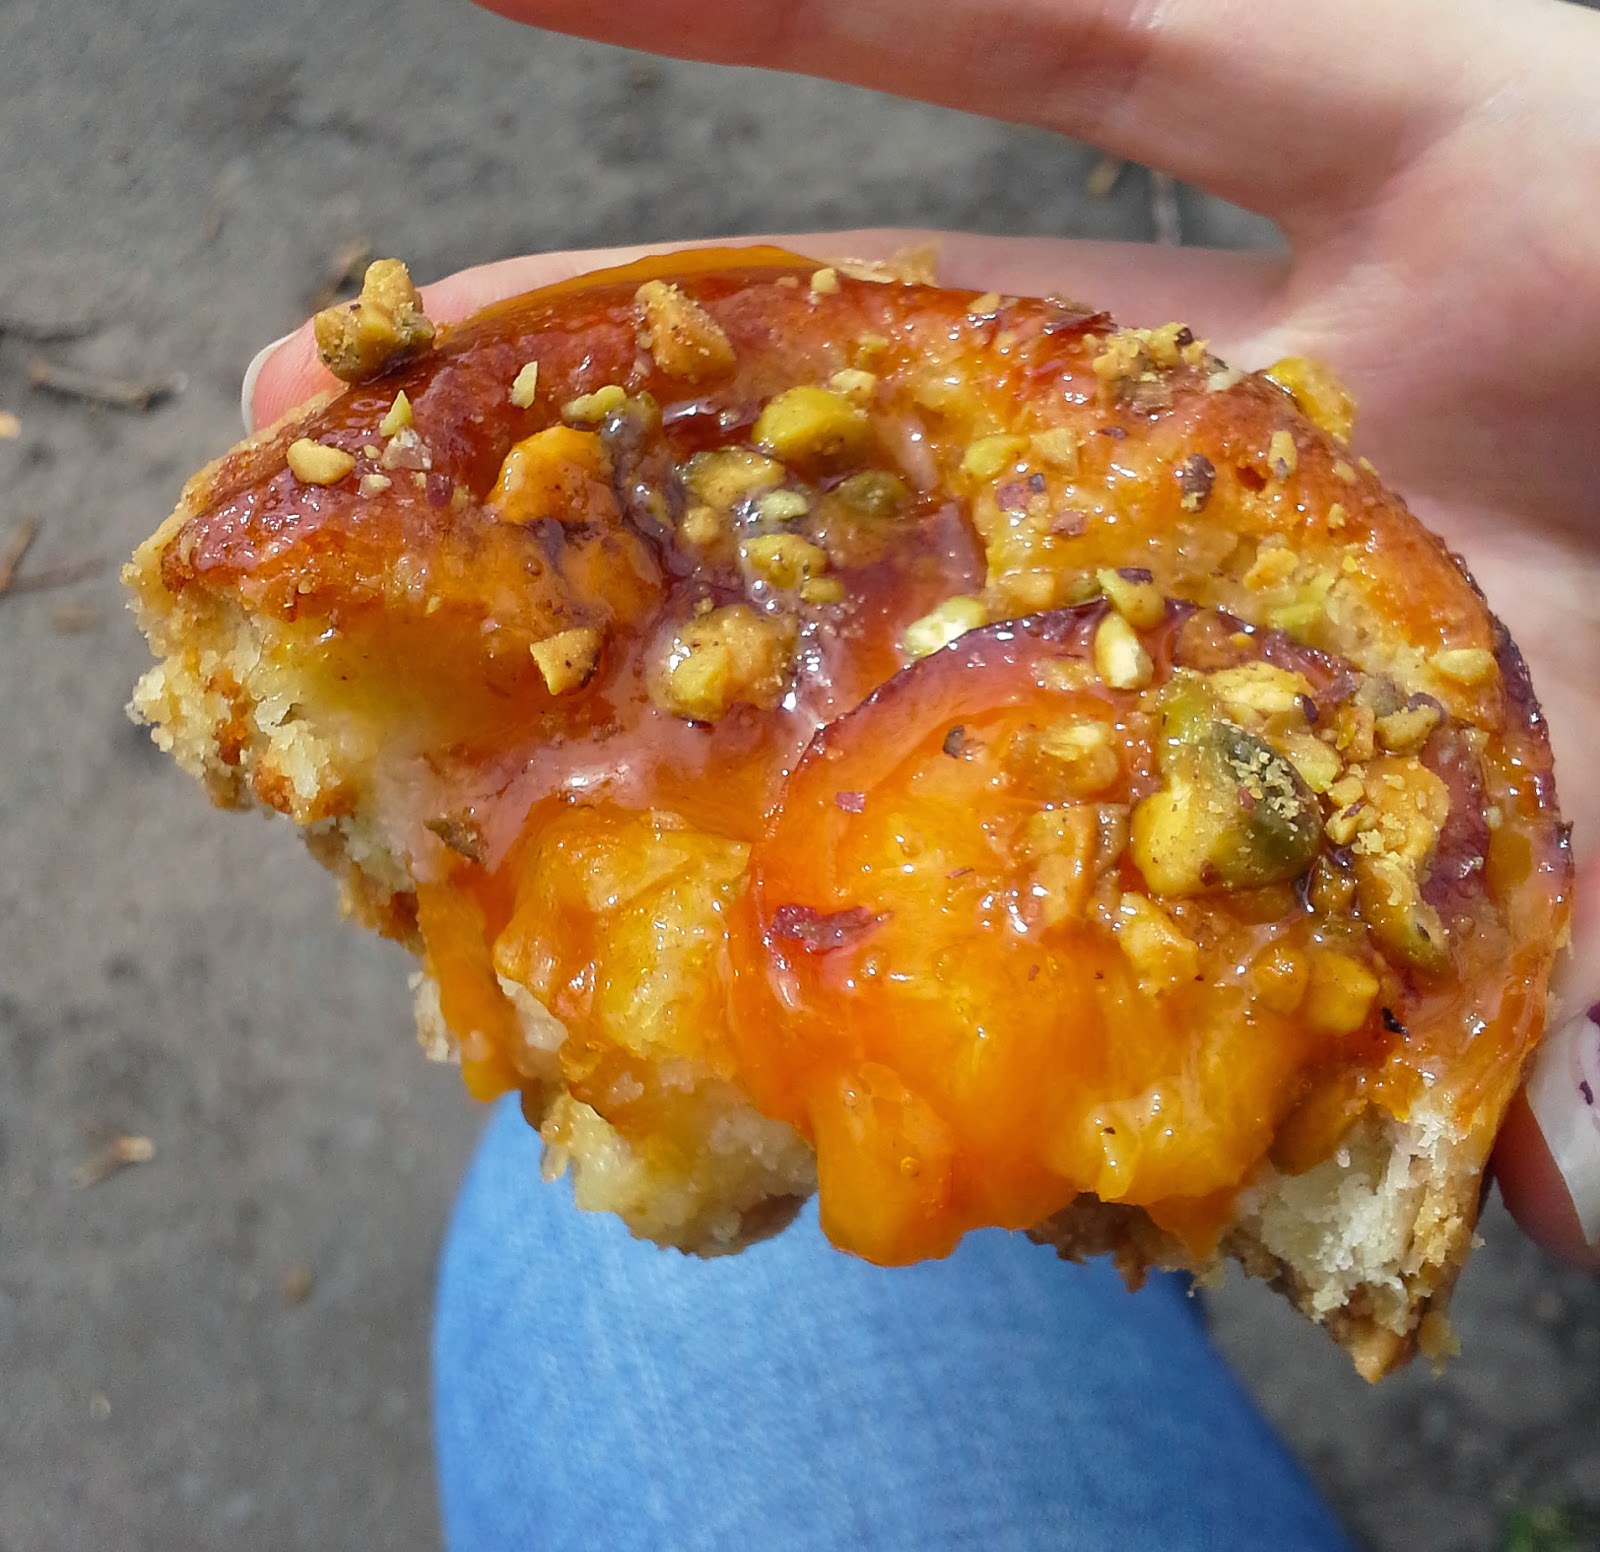
Monday, December 2, 2013

A Birthday Cake to End All Birthday Cakes

Welcome to Wolf Chops, Thanksgiving Edition! In honor of the holiday, I present you with a guest post from my sister, describing the birthday cake she made me six months ago. But it's utterly excessive, so frankly I think it fits with the whole spirit of Thanksgiving, and it includes roughly 3 sticks of butter, which is almost the same as oil, so bam, Hannukah too. This recipe is picky, and time-intensive, and a crap-ton of work, and absolutely one of the best sweets I've ever eaten. And I now fresh apricots are basically impossible to find right now, but I don't see why you couldn't make the pastry cream with, say almonds or walnuts or pecans instead of pistachios and then put some cinnamon-poached apples or pears on top instead for something seasonal. Or roasted chestnut and quince. Or pumpkin pie filling. Whatever. It's more or less just a giant croissant with fruit and cream on top, so you can do what you like. Yes, it will have a million calories and take all day, but a) it's the holidays so it'll fit right in and b) worth it! So without further ado, Sarah's Insane Giant Croissant Cake. 


Pretty, ain't it?
***
Each year, I have to top the last birthday cake I made for Emily. Last year, I made a beautiful peach blueberry tart (pictured above in the sidebar). (EAG: That was a damn tasty tart.) Emily gave the in inspiration for my cake in April. She texted me a picture of a pistachio apricot danish that she gets at a local farmers market. She kept raving about that pastry, so I decided to make a variation of that. 

My first question was what to use a base. I wanted something denser than a cake. Emily suggested making a crust with almonds (EAG: gluten free so Mom could eat it!), but that was too close a tart crust. Then it came to me: I should base the crust on croissants I had experiment with making croissants last fall, and had found a really good recipe. The croissant dough would be similar to the danish base, but even better.

The tart that started it all...

There are basically three stages for making croissants. The first step is making the dough. You melt butter, add some milk, and once the butter dissolves and the temperature of the milk is below 90`F, you mix in the yeast. You then combine the milk mixture with flour (preferably King Arthur all purpose flour; it has the best protein content), sugar and salt in a mixer with a dough hook. The dough should form a slightly sticky ball. The dough then rests in the fridge on a parchment-lined baking sheet overnight.

While the dough was resting I tackled the pistachios. My first thought was to make a pistachio-flavored pastry cream, using pistachio extract, but that would be too close to last years’ again. Then I came across a recipe for "Snow Eggs in pistachio cream" in the Gourmet Cookbook. To make the pistachio cream, you grind the pistachios in a food processor with a little milk, and then refrigerate the mixture for at least 8 hours to develop the flavors. I originally made one batch of this, but it was so yummy, I made another.

The second stage or croissant making is laminating the dough. You beat butter into an 8" x8" block, then place the butter in the middle of the croissant dough, that has been rolled out to 24"x8". You then fold the dough over the butter block and seal it in the dough. Then you roll the dough out to 8"x24" again, and then fold the dough in thirds, like a letter. You repeat the rolling out and folding a couple more times (at least 3, I did 5), to layer the butter between the layers of dough. After it was laminated, the dough had to rest in the freezer for 2 hours. 

Decorating the tart.

While the dough was resting, Emily and I tried one of the apricots that had been bought for the cake. They were very tart and mealy. To improve the flavor and texture, I decided to roast the apricots with vanilla. I had hoped that it would add more sweetness, and the vanilla would mellow the tartness. After they were done roasting, they still weren't quite sweet enough, so I finished them off under the broiler, with a little vanilla sugar sprinkled on top. At this point, they were still quite tart, but the tartness was no longer overwhelming.

After the dough had rested for 2 hours, I rolled it out until it was about 1/4" thick at the center. I then draped the dough into a tart pan and molded the dough to the edge of the pan. Because the cake is a riff on a cheese Danish, I rolled 1 inch of the excess dough in to create a rolled edge. In hindsight, I should have painted the excess dough with the pistachio cream before rolling it, to break up the monotony of the huge crust. I set a straight-sided bowl in the middle of the giant Danish to stop the dough from rising too much and obliterating the center depression, and left it to rise for 2 hours.

An hour and a half later, I preheated the oven to 425`, and took the bowl out of the center of the Danish. I then painted the Danish with a basic egg wash, with a little extra sugar. When the oven was preheated, I put the Danish in and immediately lowered the heat to 400`. The Danish baked for 15 minutes, when it was nicely puffed and golden brown.

To assemble the cake, I spooned the pistachio cream into the depression, the draped the apricots on top. The blackberries were placed around the apricots, along with some almond slivers. The final step was to eat it. And it was very tasty. (EAG: Damn straight.)

By the slice.

Apricot-Pistachio Danish Cake
Croissant dough:
3tablespoons unsalted butter plus 24 tablespoons (3 sticks) unsalted European-style-butter, very cold
1 3/4cups whole milk
4teaspoons instant or rapid-rise yeast
4 1/4cups (21 1/4 ounces) all-purpose flour
1/4cup (1 3/4 ounces) sugar
2 tsp salt
1large egg
1teaspoon cold water

Pastry cream:
1/2 cup shelled pistachios
2 tbsp sugar
7 tbsp of whole milk

Roasted apricots:
7 apricots
1/2 vanilla bean, seeded
1 cup white wine
1/4 cup vanilla sugar 
Slivered almonds

Egg wash:
1 egg
1/4 cup sugar
Dash of salt
Dash of water

Optional:
Fresh blackberries

Slivered almonds, after being roasted with the peaches.

1) Melt 3 tbsp butter in over low heat. Take of the heat and immediately stir in the milk. Let cool til the temperature is under 90’. Whisk in the yeast, and pour it all into a stand mixer. Add flour, sugar, and 2 teaspoons salt, then knead on low speed using the dough hook roughly 2-3 minutes, until dough forms. Up the speed to medium-low and knead for another minute. Cover the bowl with plastic wrap and let it rest on the counter for half an hour.

2) Line a rimmed baking sheet with parchment paper dump in the dough. Shape it into a 10-by-7-inch rectangle, about an inch thick. Wrap tightly with plastic and stick in the fridge for 2 hours.

3) Meanwhile, fold 24-inch length of parchment paper in half to create 12-inch rectangle. Fold the 3 open edges over to form an 8-inch square with enclosed sides. Crease the folds firmly. Place 3 (sliced) sticks of cold butter directly on the counter and whack them with rolling pin for a minute or so until the butter is just pliable but not yet warm, then fold butter in on itself using bench scraper. Beat it into rough 6-inch square. Unfold your parchment envelope. Using the bench scraper, transfer the butter to the middle of the parchment, then refold it enclose. Turn the packet over so that the flaps are underneath, and gently roll with the rolling pin until the butter fills parchment square, making sure it’s even. Refrigerate at for least 45 minutes.

4) Put the dough in the freezer for half an hour, then lightly flour your counter and roll the dough into 17 by 8-inch rectangle with the long side along the edge of the counter. Unwrap the butter from the parchment and place it in the center of the dough. Fold the sides of the dough over the butter so they meet in the center, and press the open edges together so they seal. Roll the butter/dough package out lengthwise into 24 by 8-inch rectangle. Starting at the bottom of the dough, fold it into thirds like a business letter. Turn the dough 90 degrees, then roll it out lengthwise again into 24 by 8-inch rectangle and fold into thirds again. Place the dough on your cookie sheet, wrap it tightly with plastic, and put it back in the freezer for another half hour.

5) Put the dough back on your lightly-floured countertop so that the top flap opens on the right. Roll the dough out lengthwise into a 24 by 8-inch rectangle and fold into thirds (yet again). Place the dough back on the sheet, wrap it tightly with plastic, and refrigerate it for yet another 2 to 24 hours.

6) Make the Pistachio Cream: Finely grind the pistachios in a food processor with the sugar. Add 2 tbsp of milk, and grind until it forms a paste. Add the remaining 5 tbsp of milk and mix in the food processor until well combined. Transfer the cream to a bowl and refrigerate for a few hours to develop the flavors.


Pistachio cream (can also be eaten straight with a spoon).

7) Shape the Crust: Remove the Croissant dough from the refrigerator and roll it out until it’s about 1/4" thick. Drape the dough in a tart pan, so that there is a least an inch of excess dough all around when the dough is molded to the sides of the pan (trim off any extra excess dough to use/eat later). Paint a little of the pistachio cream on the excess dough. Roll the excess inch of dough to make a Danish-like edge to the tart. Place a buttered bowl with straight sides in the middle of the pan to keep the dough from rising in the center, and let the dough rest of 2 hours.

8) Prepare the Apricots: Preheat oven to 400`. Slice each apricot into 4 flat slices with parallel cuts and place them in one layer in a baking pan. Scatter a handful of slivered almonds. Mix together 1 cup of white wine, the vanilla seeds, and 2 tbsp vanilla sugar. Pour the mixture over the apricots, and place the vanilla bean pod in the pan. Roast for 30 minutes, or until most of the liquid is gone. Put aside and let cool.

Apricots, pre-roasting.

9) Preparing the Crust: Raise the oven temperature to 425`. After it has sat for at least 2 hours, remove the bowl from the croissant crust. Combine the egg, sugar, and a dash of salt with a dash of water, and mix until well combined. Paint the croissant crust with the egg wash.

10) Bake the Crust: Place the croissant crust in the oven and immediately turn down the oven's heat to 400`. Bake the croissant tart for 15 minutes, or until golden brown. The dough will puff up a lot. Remove from the oven and let cool. 

Final assemblage.

11) Turn the oven to broil. Sprinkle the apricots with the rest of the vanilla sugar, and broil them, just until they begin to brown. (Keep watch so they don’t go up in flames!) Take them out of the oven and let them cool.

12) Assembling the cake: Spoon a quarter cup of pistachio cream into the center of the croissant crust, and spread it evenly. Cover the cream with the broiled apricots. Place the slivered almonds and blackberries on top of the apricots prettily. Add candles, sing happy birthday, and bask in the adulation of everyone there.

(with a bowl of pistachio cream & fruit for the gluten-free set)


Saturday, November 16, 2013

Science Experiment Soup

Oftentimes I'll be in the midst of making dinner and discover something new. Like for example: If you walk away from caramelizing onions for even one second, they'll turn to charcoal. Or: rinsing leeks in a bowl of water after you chop them is way easier. Or even: caterpillars can survive for a week in a bag of greens in the fridge, and they don't always appreciate being banished to the back yard when you find them. More often than not my discoveries are either very tasty or somewhat explodey (see: adventures in Soda Stream ownership) or liable to set off the smoke detector. Rarely are they this pretty.

 A few weeks ago I had N. over for dinner. A few days earlier at the farmers' market I'd been dazzled by a purple cauliflower, so we decided that that plus a celery root getting near the end of its lifespan in my crisper would make a lovely pairing for my Random Root Soup, with a little quinoa for texture. (1 part rinsed quinoa to 1 part broth or water, bring to a boil, turn down heat & simmer 10 min, cover, turn off heat and let sit 5 min, fluff with a fork and eat.) So we chop and roast and stir and boil and whizz in the blender (and there goes my nice cloth bag for steeping herbs and cheese rinds), and 45 minutes later, pretty light-purple soup. Shower with some chopped parsley, drizzle with olive oil and lemon, and -- what now?!? Where the drops of lemon juice hit the soup there were now hot pink polka dots, getting brighter as time went past. Our soup - which was just as delicious as anticipated, by the way - was a litmus test.

I suspect a lot of us did that science experiment in the 4th grade where you use juice from a red cabbage to test for acids and bases, and I can only suspect that whatever's in the cabbage that does that is in purple cauliflower too. Based on follow-up experiments with the leftovers I can tell you that cold the soup turns sort of gray, brightens up to a nice light pink when reheated, turns fluorescent with acids, and goes a kind of tealy greyish green in the presence of a base (ie baking soda). So it's a litmus test/thermometer. A delicious litmus test/thermometer. I'd test for other properties, but, well, I ate it all. Occupational hazard, I guess.

Straight outta the fridge, cold.

Reheated in the microwave. My camera's kinda lame about color but it's a nice light rose.

Lemon juice: bright pink spots.

Admittedly this looks more like something you come across on WebMD looking up skin conditions than something
you wanna eat. But just stir it and it starts looking all swirly and tie-dye rather than infectious..

And turning a spoonful greenish-grey with baking soda, since I didn't wanna ruin a whole bowl. Science!

Saturday, September 28, 2013

A Moveable Crisp

My timing here is impeccable - now that blueberry season is thoroughly and inarguably over, I'm posting a recipe that calls for something like 6 cups of blueberries. Brilliant. But good frozen berries will work just as well, and soon enough it'll be summer again (right? right???), so I'm just gonna ignore that and go ahead and post anyway. Feel free to just bookmark this and come back in 9 months or whatever. Fine.

Two things happened to make this recipe happen. One was that my mother and I went blueberry picking, and it was a gorgeous morning, and the blueberry bushes were just bursting, and we had these big plastic buckets that hold more than you think, and long story short we ended up with something like twelve pounds of blueberries. The second thing is that my dear dear friend A., who lives in Syracuse, invited me up to his place for dinner. Which ended up more like munching/drinking/talking til all hours. But the food was damn good. (Pro tip: grill lime slices briefly before making mojitos out of them, for a lovely smoky caramelized flavor.) Me being me, I decided to make a blueberry crisp to bring along (along with a pile of cherry tomatoes from the garden, and some zucchini...). And no, plain crisp would not do. This would be coconut blueberry crisp! Because kind of like prosciutto, coconut makes just about everything better. And unlike prosciutto, coconut actually goes well in (non-savory) baked goods. And so a crisp was born.

Doggie bags.

Two last wrinkles. 1) This crisp would be gluten-free, because my mother doesn't keep any normal flour in the house so that wasn't an option. And 2) this had to be something I could carry out in bags and assemble on-site at quarter to midnight after a couple of mojitos, 'cause a pan of crisp sitting on the passenger's seat for the hour-and-20-minute drive up to Syracuse is just asking for trouble, and besides it's so much better warm out of the oven anyway. What I ended up with (and made a second time the next week for a bbq at my aunt's place) was totally portable and pretty fantastic. I suppose you could probably use any kind of berries or even chopped fruit, like peaches or apples (see, it is seasonally appropriate!). Sub in different nuts, different spices, whatever. Ditch the flax seed (though I promise it's delish, and adds both protein and hippie street cred) or double it. Mess with the spices at will. But here's the basic idea.

Blueberry-Coconut Crisp To-Go
Filling:
6 cups blueberries
~1 tbsp cornstarch
2 tsp powdered ginger
1/4 cup shredded dried unsweetened coconut
1/4 cup almonds and/or walnuts
a good pinch of salt

Topping:
3/4 cup rolled oats
1/4 cup some sort of flour (I used tapioca, regular will do)
1/3 cup brown sugar
1/2 cup coconut
1 tbsp minced fresh ginger
1/2 cup almonds and/or walnuts
1/4 cup flax seeds
1/2 tsp cinnamon
1/2 stick unsalted butter, at room temp

Assembled.

Ahead of time:
1)  Put the blueberries in a plastic ziplock or container. Coarsely chop (or grind in a food processor) the nuts. Put all of the filling ingredients in a bag (apart from the blueberries). Put all the topping ingredients except for the butter in another bag.

2) Go where you need to go.

3) Preheat your host's oven to 375. Put the blueberries in a roughly 2-quart baking dish. Toss with the contents of the 'filling' bag until everything's evenly distributed.

4) Borrow half a stick of room-temperature butter from your host. Cut it into small chunks, put it into a big bowl, then use a pastry blender or your hands to mix it with the contents of the 'topping' bag until everything starts to bind together. (You could probably use coconut oil here if you wanted to be vegan about it.)

5) Sprinkle the topping over the filling to get an even crust. Bake for about 45 minutes, until the filling is bubbly and the top is golden brown. Let cool as long as your self-control allows. Serve warm with vanilla ice cream.

Baked.


Tuesday, September 24, 2013

End-of-Summer Bliss

-Sweet corn kernels, cut off the cob,
-Sauteed in butter,
-With salt and pepper,
-And a generous handful of chopped fresh basil.

That is all.


Wednesday, August 21, 2013

Pepper Pops

So you know how I said last time I'd be posting popsicle updates? Well here's one already. (I'm in Germany for the week, so keeping this post short and sweet. Like a half-eaten popsicle.) In my searches for interesting flavor combinations I'd come across a few pop recipes involving strawberries and black pepper, which frankly struck me as kind of weird. (Not that that ever stops me, but.) And then the inimitable Deb Perelman of Smitten Kitchen posted her own version, so I had to try it. These are a combination of that and a roasted strawberry-pink peppercorn-orange zest pop I found at The Vanilla Bean, but with juice instead of zest because a) it fills up more space and b) I'm too lazy to zest, particularly when there's a bottle of fresh-squeezed OJ sitting in the fridge. (Yes, I'm perfectly happy to hull and roast strawberries but not zest an orange. I never claimed to be consistent.) These probably aren't the popsicles you'd want to serve to a roomful of children - they're tart from the lemon and a little spicy from the pepper - but there's no kids in sight where I am and frankly I think they're delicious. (Would I be writing about them otherwise?) And then there's the added bonus that since any resident little ones won't be wanting to eat them anyway, nobody'll mind if you follow SK's suggestion and slip a little tequila into the mix. (I didn't but I can't imagine it'd be anything but wonderful.) So without further ado:

minus one small bite.


Bright Pink Grownup Spicy Sour Strawberry Popsicles
(makes 2 half-cup pops; multiply as necessary)
3/4 cup hulled and halved strawberries
1 tbsp maple syrup
drizzle of olive oil
a pinch ground black pepper (start small, increase to taste)
small pinch salt
just over 1/4 cup good fresh OJ
just under 1/4 cup lime juice (tweak OJ/lime ratio to taste)

1) Preheat the oven to 400. Spread the halved, hulled strawberries on a baking sheet, then drizzle with olive oil and the maple syrup and sprinkle pepper over. Roast about 20 minutes, til the strawberries start to collapse, but watch out that the juices don't burn. (Browning is fine, blackening isn't.)

2) Scrape roasted strawberries and all the gooey mess around them on the pan into a glass measuring cup. They've probably reduced down to about half a cup. Fill the measure up to the full cup line with slightly more OJ than lime juice (exact amounts will vary depending on how much strawberry you end up with and how tart you want it).

3) Dump all that in the blender with a small pinch of salt. Whirr, taste, adjust, pour, freeze.


Thursday, August 8, 2013

Popsicle-palooza

It's time.


I've been saving this one up for a while, trying to make as many kinds of popsicles as I could before posting. And while this is nowhere near 'as many as I could', it's still a heck of a lot of popsicles. I'll probably update as the summer goes on. Hell, why stop at summer, I'll probably update indefinitely. But summer is nice in that there's all sorts of wonderfully delicious fruits and herbs and things popping up in the garden and the farmers market, which makes for some spectacular pops.


Clockwise from top: stone fruit medley, cucumber gin & tonic, jasmine rhubarb, blueberry basil lemonade, honeydew-mint, and mixed berry smoothie.

It started early this summer, when I got a craving for ice pops that just wouldn't go away. Specifically the apricot rice pudding pops from last summer's Bon Appetit, which are fantastic (tweaked recipe below). After a week or so I gave in and ordered some molds from Amazon (pro tip: I later found the same ones at TJ Maxx for half the price), and started pureeing and freezing basically everything I could. And then I caved again and bough a recipe book from People's Pops, who make incredible if super-hipstery pops in Brooklyn, and tried a few of their recipes. And it was all delicious.


Matcha green tea, piña colada, roasted plum with rosemary, and blackberry-nectarine.

Here's some things I've learned about making popsicles:
  1.  All you really need is something you can fill a mold with. I was gonna say 'liquid', but actually that's not true. Thick glop works pretty well too (see i.e. banana fudgesicles below). That can be as simple as fruit juice or a pureed plum, or as complex and full of spices and herbs and alcohol and whatever as you like. Personally I like a little textural contrast, like chopped cherries in a nectarine puree, whole blueberries in lemonade, or nuts and granola in an almond milk-banana mixture. (Yes, really. Best breakfast ever.)
  2. Almost everything will work, but not everything everything. I tried two different black tea-based pops, and both ended up tasting funny. Pureed blueberries end up kind of slimy, making for a not-great pop: either strain out the juice and use that, leave them whole or halved in the mix (very pretty), or make sure they're just a small percentage of the total pop. Carbonated beverages will expand more than other things, so leave more room than usual at the top. Too high a percentage of alcohol and it won't freeze (though then you just get a booze slushie, and there are worse things.) 
  3. Taste the mixture before you freeze it and adjust as necessary. Add a little acid to make the flavors pop. Supposedly things taste less sweet when they're frozen (?), so some say to add a little more sweetener (sugar, maple syrup, honey) than you normally would. I dunno. Experiment. If you hate what comes out, run some hot water over to melt it down the sink and try something else.
  4. Know how much your molds hold, so you can make an appropriate amount. Mine are a half cup each, but models will vary, particularly if you're using juice cups or ice cube trays instead of actual molds. If you make too much, or don't have enough to fill a mold, remember that these are basically smoothies and can be drunk directly from the blender. A glass liquid measuring cup is good both because a) it's a measuring cup and b) the little spout makes it easier to pour into the molds without dripping everywhere.
  5. They're really photogenic.

Ginger-peach, apricot-pistachio, and watermelon-kiwi-lime.

These are all vegan (I think one calls for honey, just use sugar), and (almost) totally fruit-based, so I see nothing wrong with eating, like five a day. As always, play around with these. Where I use almond milk, sub in real milk, or coconut milk, or hemp milk, or whatever. Replace my maple syrup with white sugar/brown sugar/agave/honey/dates. Sub peaches for nectarines. Roast the fruit to intensify the flavors, or not. Strain it for a more refined texture, or leave chunks in the puree. I like to leave the skins in for berries and stone fruit (looks like confetti!), but you can take it out. Same for berry seeds. If you don't wanna buy molds, use cups, with spoons for sticks. Just for the love of god use good, ripe fruit. Crap fruit = crap popsicle, so don't expect to use rock-hard peaches and underripe strawberries and get a good result. If it's good to eat, it'll be good to freeze.


Ginger-peach and peach-tarragon.

I've put a bunch of pop recipes here that I made and liked. More are described in the photos but not spelled out; a general recipe for those is to chop/puree the things in the name, then freeze. If there's an herb or aromatic (tarragon, ginger), you can either blend it straight into the mix or get a more pervasive flavor by steeping it in a little boiling water and adding that instead, either straining out the herb or, again, blending it. You can find more ideas on my popsicle board on Pinterest, as well as this one, this one, and this one. Or just google 'popsicle recipes' and wait for the 4.5 million or so hits to pop up.


Stewed apricot with star anise, bubble tea, jamaica (aka hibiscus flower, aka red zinger), banana-granola, chocolate banana faux-fudgesicle.

Banana-Granola Breakfast Pops
Ok seriously, I was skeptical when I first tried these. But for real, after all that, they're my favorite. (Well, tied with the stone fruit bonanza pops below. Those things were awesome.) Think of it kind of like oatmeal, but frozen. And wonderful. The original recipe came from The Frosted Vegan.


3 parts banana
1 part almond milk
A few drops of vanilla (or almond) extract
A spoonful of maple syrup
2 parts granola
Half as much fresh berries
A small handful chopped nuts (optional. Actually, everything but the banana, milk, and granola is optional)

1) Toss the first four ingredients in the blender, and puree til smooth. (Add more milk if the bananas won't puree, but give it a good go before you do.) Taste, and adjust for sweetness.

2) Pour the banana goop into a pyrex measuring cup (or something else with a spout; this gets gloppy). Stir in everything else. Pour into molds. Freeze.


The best place for a popsicle: a backyard barbeque.


Stone Fruit Cornucopia
Stone fruits are my favorite fruits. To make this pop I basically went to the grocery store in mid-June, bought every kind of stone fruit they had, and mixed them together. Turns out that was a great idea.

Ok, so I skipped the peaches and apricots, so sue me.

White nectarines
Plums with white/pale yellow insides
Peaches
Red/purple/black plums
Sweet cherries

1) Chop the nectarines, peaches, and light plums. Eat the peaches. Put the nectarines and plums in the blender and puree.

2) Chop the cherries and dark plums into a small dice. Mix everything together and pour into molds. Freeze.


Blueberry Basil Lemonade
Boil enough water to fill half your molds, and add torn basil leaves and a bit of sugar. (I used Thai purple basil.) Set aside to cool. Add a squirt of lemon juice. Halve about half your blueberries and leave the other half whole. Mix, pour, freeze.


Apricot-Star Anise
Slice your apricots into wedges and add to a pot with enough water to half-cover them. Add a pinch of sugar and a few star anise pods. Simmer til the apricots get nice and soft and fragrant. Pull out the anise - these don't puree well. Blend, taste for sweetness and acid,  pour, freeze.

Apricot-Pistachio
Slice your apricots into wedges, and add to a pot with some almond milk. Smash up some pistachios and add them too. Simmer til the apricots get nice and soft and fragrant. Blend, taste for sweetness and acid,  pour, freeze.


Piña Colada
Blend 3 parts coconut milk, 2 parts fresh pineapple, a pinch of cinnamon, a bigger pinch brown sugar, and a splash of rum (Malibu?) until smooth. A squeeze of lime would be nice in place of the cinnamon too. Freezing is totally optional for this one, though if you're just gonna drink it you should up the rum content.

Cucumber Gin & Tonic
Cut into matchsticks enough cucumber to half-fill the molds. Mix one part gin to two parts tonic (or seltzer water), enough to almost fill them the rest of the way. Add a bit of sugar (seriously) and a squirt of lime. Leave enough room at the top of the molds so these don't bubble over everywhere like mine did.


Add mint and call it a mojito.


Banana Faux-Fudgesicle
Blend bananas with a good bit of cocoa powder, a spoonful of maple syrup, a touch of vanilla extract, and just enough almond milk to make it go. A bit of cinnamon or some chopped almonds would work well too.

Roasted Plum and Rosemary (yes, really)
Halve your plums, pull out the pit, and roast them at 400 for about 10 minutes til they get nice and soft. Meanwhile, boil a sprig of rosemary leaves and a bit of brown sugar in some water. Take out the rosemary (too tough), blend it all together, etc.


Roasted plums, rosemary syrup.


Apricot Rice Pudding Pops
(adapted from BA)
1 1/2 cup almond milk
1/2 cup coconut milk
1 lemongrass stalk, pounded with a mallet and tied into a knot
2 tbsp ginger, minced
1 tsp vanilla
3 tbsp short grain rice (arborio, sticky/sweet, etc)
1/4 cup dried apricots, chopped
1/4 cup brown sugar
pinch of salt

1) Soak the rice in a bowl of water. Simmer the milks, lemongrass, ginger, and vanilla in a pot. Don't let it boil, or the coconut milk can separate.

2) Pull out the lemongrass and toss it. Puree the spiced milk and ginger until smooth. Drain the rice. Put the rice in the milk/ginger mixture, add the sugar and pinch of salt, and simmer about half an hour, without stirring.

3) Stir in the apricots, pour into molds, freeze.


Watermelon-lime-kiwi. Figure it out yourself.


Peach-Tarragon or Ginger-Peach
Steep some tarragon leaves or chopped ginger in boiling water. Puree with sliced peaches and a bit of sweetener.

Rhubarb-Jasmine
Brew some strong (but not bitter) jasmine tea. Chop some rhubarb into inch-long pieces. Just cover with the tea, add honey, and simmer til the rhubarb gets all soft and starts to fall apart.Mash the rhubarb up a little with a fork, pour, freeze.


Blackberry-Nectarine
Puree nectarines. Set aside. Puree blackberries with a little coconut milk, some lemon juice, and brown sugar. Pour alternating layers of nectarine and blackberry purees into molds.

Raspberries work well too.

Etc, etc.
Make a smoothie. Freeze it. Bam.


The End.


Friday, July 19, 2013

Pickled

So you know how last time I said it was way too hot to cook so I gave you a crockpot recipe? Well the last few days it's been too hot to even turn on the crockpot. Like tonight, I went to scramble an egg for dinner and couldn't even take it. In other words, sandwich and microwave time. (Except for two nights ago, when I set my toaster oven out on the back stoop to bake some stuffed summer squash. Yum.) And you know what goes great on those sandwiches and doesn't require any added heat at all? Pickles.

I just finished reading Michael Pollan's new book, Cooked: A Natural History of Transformation, on (surprise surprise) cooking, and all the anthropological/archaeological/evolutionary/biological/chemistry-ical issues surrounding it. I've been a Pollan fan ever since I read The Botany of Desire back in high school, and this one very much lives up. The first section is on roasting meat, with a focus on Carolina bbq (nom nom nom); the second is on soups and stews and braises; the third is on baking bread; and the final section is about fermentation of all kinds: cheese, alcohol, kimchee, pickles. It was the last that grabbed me the most, maybe because it's so far removed from the others: instead of an active process of chopping and adding and kneading and stirring, with the aid of a lot of heat and a bit of time, with fermentation the work is done by a (relatively) lot of time and a million micro-organisms, the same things other modes of cooking kills. There's all sorts of claimed health benefits about eating the kinds of live cultures (aka bacteria/fungi/etc) that live in fermented food (google "microbiome", or see Pollan's piece for the NYTimes magazine, or read anything Sandor Katz ever wrote), so that's cool. But I think what got me is the largely hands-off nature of the project: you're not constructing a product, or directly setting up a chemical reaction, you're creating the conditions for an ecosystem. And, ok, then eating that ecosystem. As Pollan says, it's less like cooking and more like gardening.

So a few days after I finished the book I'm walking around with fermentation on the brain, looking for an opportunity to try it out, when an article pops up in the Dining section of the Times about real lacto-fermented pickles, complete with recipe. And the day after than I find pickling cucumbers at the farmers' market downtown. Needless to say, by that night I had a batch going on my counter.

Any you know what? Pollan was right: there was something downright magical about the process. Lord knows I've seen some pretty sweet transformations enacted in my kitchen before: I've braised meat, baked bread, boiled bagels, made yogurt (successfully) and paneer (fine til I burned it), cooked a pile of tomatoes down into a pot of sauce and a pile of apples into apple butter, roasted Chinese duck and rotisseried Thai chickens and souped and stewed and chopped and sauteed with the best of 'em. But something about the time (3+ days) and the almost total lack of having to do anything combined with the fact that hey, you know that jar I set out the other night? There's something totally different inside it now, and it smells awesome - all that made it feel like something of a miracle. (Ok, the yogurt was a close second: rather less time, more stirring, less chopping, equally dramatic transformation, also technically fermentation. And granted he idea of bacteria doing something weird to food left out on the counter is hardly revolutionary - that's why we invented refrigerators. But still.) And yeah, the pickles were awesome.

Pickles!


Sour Dill Pickles.
These are fermented. In other words, no vinegar; all the work is done by the yeasts and bacteria on the skin of the cucumber and floating around in the air. No, it's not dangerous; according to Pollan the FDA has had zero confirmed reports of food poisoning from this sort of thing. The lactobacilli like the salt, and they out-acidify any nasty-making competitors. But do read Katz or Pollan if you're interested in the actual biology behind it, and don't eat it if it smells funny (rather than like pickles).

pickling (kirby) cucumbers
1tbsp (non-iodized) salt to 1 cup water (brine)
flavorings: smashed garlic
dill
caraway seeds
celery seeds
jalapenos
etc

1) Rinse the cukes in cold water. Wash out enough jars to hold them. (No need to sterilize, but do be sure they're clean.)

2) Boil enough water to completely cover the cucumbers in the jars. (May I recommend using an electric tea kettle to avoid heating up the kitchen while you're at it.) Dissolve 1 tbsp salt for every cup of water. Don't use iodized salt; that screws things up. Add a handful of ice, set aside and let cool to room temp.

3) Slice the cucumbers into spears or chunks. (Or don't.) Seed them. (Or don't.) Smash some garlic cloves. Chop some fresh hill, or get out the dried stuff. Slice some jalapenos. Or use whatever other seasonings you like, or none. Put the cucumbers in the jars, packed fairly tight so they don't float. Put in the herbs and things. Pour enough brine over top to completely cover the vegetables so they don't get moldy.

4) Set the jars in a dish (in case they bubble over) in a not-too-hot part of the house (good luck) and cover loosely with the lids. Watch and wait. After a day or so you should start to see little bubbles, and maybe smell something intriguing. After 3 days the water will be cloudy and you'll have pickles. Taste. If they're good, screw the tops on tight and stick 'em in the fridge. If you want them more sour, leave out for another day or two, tasting occasionally. Eat with a nice cold sandwich. Attempt with other vegetables than pickles if you're feeling adventurous.

Friday, July 12, 2013

Cool Beans

It's too hot to cook. Ever since I heated up my apartment to 87 degrees (87 degrees!) by making a pot of ratatouille, I've been making sandwiches, nuking leftovers, and occasionally boiling a little pot of pasta or sticking something in the toaster oven. (Or staying at my parents' house, where 90% of the cooking this time of year is done by my father on the grill.) So when I say to make this soup on the stove, ignore me. Seriously, don't do it. When I actually cooked this, a month or two ago, the temperature was normal and I could boil a pot of chickpeas without also boiling myself. From, now til September I'm recommending the crockpot method, which I haven't actually tested out but hey, what could go wrong? At the very least it's far less likely to turn your kitchen into a sauna. Which frankly right now is my highest priority, so.

This is a lovely soup, which I found on Pinterest (original here). It's basically liquid hummus, for better or worse. Given my feelings about hummus, I'm going with better. That said, it's one of those flavors that I love for the first half of a bowl and then kind of feel like enough's enough, so I'd suggest having a small bowl as an appetizer or alongside a salad and/or sandwich instead of making it your whole meal. But don't listen to me. (Do you ever?) Alternatively, it would make a good sauce for something like falafel, or maybe a dressing for a Middle Eastern-ish salad. In which case you'll want to make a whole lot less, unless you eat a *lot* of falafel.

Chickpea soup with olive oil, sumac, and lemon juice.


Chickpea Soup
2 cups dried chickpeas, or 1 big can canned chickpeas (dried tastes better but requires advance planning, never my strength when it comes to dinner)
4 cups broth of some sort (chicken/veggie)
water
1 big onion, diced
2-4 garlic cloves, minced
2 bay leaves
1 tsp. cumin
salt & pepper
olive oil
Garnishes: sumac, paprika, lemon juice, feta, parsley, cilantro and/or whatever else looks good, to taste

1) If you're using dried beans, soak them overnight first. If not, open and drain the can of beans.

2) Saute onion until it's translucent and beginning to brown, then add the garlic, cumin and bay leaf, and saute a minute more until everything's fragrant. (Note: On a hot day, skip this step. You miss out on all the wonderfullness that comes with a good Maillard reaction, but also a lot of sweat.)

3) Dump everything but the garnishes in a pot or crockpot. Cook until done. Crockpot: low heat. Stovetop: gentle simmer. Here's a handy table to make sense of cooking time, given all the variables.


Crockpot
(low setting)
Stovetop
(gentle simmer)
canned beans
45 min?
30 min?
presoaked dry beans
7-8 hours
1-3 hours
unsoaked dry beans
are you nuts?
derrr… 4 hours?

Figure 1: Approximate cooking times

Do keep in mind though that those are very approximate, and a lot will depend on the freshness of your beans, the alignment of the planets, the will of the gods, and so forth. Keep checking, stirring, and adding water as needed. (Crockpot dry beans can be left to cook while you go off and have a productive/beach-filled day, just start checking near the end of the process.)

4) When the chickpeas are nice and soft, pull out the bay leaves and blend the whole mess til smooth. (Immersion blenders are good for this, if using a blender blender make sure to tilt up the little clear plastic bit in the middle so steam can escape, don't overfill, and keep a hand on the top to thwart explosions.)

5) Serve drizzled with olive oil and sprinkled with whatever of the above garnishes sound good to you, alongside something Mediterranean: a cucumber-tomato salad, tabbouleh, a sandwich (grilled cheese? with feta and arugula?), or at least a nice chunk of bread to sop it up with.

Thursday, June 27, 2013

Even Nicer

Just a quick middle-of-the-week bonus post while I kill time til lunch. Think of this as an add-on to that last one on socca. I think I mentioned in there somewhere that chickpea pancakes are as good done vegan with a pile of ratatouille on top as they are with onion, bacon, gruyere, and a runny fried egg. (And trust me, they're pretty damn awesome with a runny fried egg.) So: a recipe for ratatouille! I have no idea how authentic this actually is, and really I don't care (so please hold off the it's-not-ratatouille-without-peppers hate mail). This is really just an excuse to cook two of my favorite veggies, zucchini and eggplant, with lots of tomato and herbs and call it dinner. Bonus: those'll all be in season soon, and therefore extremely fresh and cheap at the farmers' market. Score. There are no definitive quantities here; just do it all to taste. What I've listed here makes a big pot, but do feel free to play around. Love summer squash? Add more. Eggplant at the store looking particularly sad this week? Leave it out. Love bell peppers? Blech. But you can add them in anyway. Hate onions (cough cough Sarah)? Sub in leeks. Just keep it all fresh and don't add anything weird and you'll be fine.


Over socca, with salad.


Summer Ratatouille
2 medium eggplants
2 yellow summer squash
2 zucchini
1 onion
a few cloves garlic
large can of diced tomatoes
2 large handfuls of fresh herbs (I used oregano, sage, a little basil, and a lot of parsley, since that's what's currently exploding in my garden)
Salt & pepper
Olive oil

1) Slice the eggplants (1 cm thick?) salt, and let sit for 20-30 minutes on paper towels or dishcloths. Pat dry, rinse, and let drip dry in a colander over the sink.

2) Meanwhile, slice the zucchini and squash into rounds (quarter inch thick?). Chop your herbs. Chop the onion and saute it in oil in the bottom of a large pot until it starts to brown a bit. Mince half your garlic and add it to the pot. Stir about a minute til things get fragrant.

3) Add all the veggies, tomatoes, and half the herbs. (Set the remaining herbs and garlic aside for later.) Salt & pepper to taste. (Taste before you salt, since the eggplant might still be salty even if you rinsed it.) Let simmer partly covered, stirring occasionally, until everything's nice and soft and the liquid has reduced down enough that it's not a soup. (The vegs will soak up some liquid as they cool, so it doesn't have to be totally dry.) Your squash coins will probably have their middles falling out, and your neat circles will have broken, but they shouldn't be total mush.

4) Add the rest of the herbs and garlic (minced) and let simmer just a minute or two more. Serve over socca, or polenta, or with bread, or tossed with spaghetti, or alongside some sausage, depending how virtuous you're feeling. Some romano cheese or even cooked chickpeas sprinkled on top is pretty good too. Makes great leftovers.

Sunday, June 23, 2013

Making Nice

Ok, I realize I may have freaked some of you out a little with that last post. Apologies. (That said, can't promise I won't do it again.) But you can come back now, it's safe, no furry head-on critters this time around. This recipe is so normal I got it from the Times. And you know what? It's really good.

See look, no ingredients with claws or ears.
 The first time I had socca (for the uninitiated: a savory chickpea flour pancake from south-eastern France/north-western Italy) was at a restaurant called Nizza on 9th Ave in New York. They serve food from Nice, which is what you would get if you mixed equal parts French and Italian, added a bit of Mediterranean sunshine, a pile of herbs, and then drank a bottle of red wine before cooking it up. In other words, wonderful. I could absolutely live on pistous and pissaladiers and good tapanade on fresh bread, and basically did on my trip to Nice a few years ago (at least when the seagulls weren't stealing the food right out of my hand). And the, gelato, oh the gelato. Of course I got a warm socca to eat at the open air market overlooking the beach, even if it was still way to cold to actually swim, being March and all.


The batter, ready for pouring.
 
 I hadn't thought about socca in a while, til a few weeks ago Mark Bittman did a column in the Times about all the wonderful non-hummusy things that can be done with chickpeas, and included this recipe. Don't get me wrong, lord knows I love hummus, but there's a whole chickpea world out there beyond garlicky spreads on pita. The original called for onion and rosemary for flavoring; I went in a different direction with sage ('cause that's how they make it at Nizza) and Italian sausage (because I had it in the fridge). Think of the batter as a blank canvas to play with as you will. It would be lovely with a handful of mixed herbs (sage, tarragon, and parsley?) and garlic; or onions and olives; a little bacon or prosciutto; some crumbled cheese. Beyond their basic sage/onion/pecorino version, at Nizza they use the socca as a gluten-free crust option for their pizzas, including a margherita; one with tomato, artichoke, goat cheese, and olives; and another with mushrooms, onions, and chevre. A nice ratatouille would be lovely on top too, with some oregano sprinkled over. You get the point - make it perfectly vegan or totally indulgent, whatever your mood. Just do try to have a light hand with the toppings so as not to overwhelm the pancake.

Sauteing the toppings.

 The only thing called for here that's slightly out of the ordinary is chickpea flour. I found a bag of Bob's Red Mill at the supermarket for a few bucks (look in the natural or gluten-free section if it's not in with the regular flour). Indian groceries would also have it, possibly under the name 'gram flour' or 'besan'. Worst case, there's always Amazon.

Socca
(adapted from Mark Bittman)

1 cup chickpea flour
1 tsp salt
1 tsp pepper
olive oil
1 onion sliced
1 handful sage, chopped
1 link Italian sausage
Romano cheese

1) Mix the chickpea flour, salt, and pepper in a bowl. Slowly whisk in 1 cup lukewarm water, making sure to get out all the lumps. Whisk in 2 tbsp olive oil. Cover and let sit on the counter between 30 minutes and 12 hours.


Pouring in the batter

2) Meanwhile, preheat the oven to 450. Add a little olive oil to a cast iron skillet. Crumble the sausage into the pan and saute with the onions until the sausage is browned and the onions are translucent, maybe getting a little browned themselves. Add the sage and stir a minute more. (If you're using other toppings, cook them now.)

3) Pour the batter over the toppings. Stir quickly once or twive to make sure everything's evenly distributed, and sprinkle a handful of romano over the top. Stick in the oven for 10-15 minutes, until the pancake is set.

Ready to bake.

4) Brush a little more olive oil over the top of the socca and set it a few inches under the broiler. Broil it just until it gets brown in spots. Serve cut into slices with a light salad and some good summer wine.


Done.